How to Fix LED Solar Lights Flashing at Night

Time:2026-10-29 Author:Madeline
0%

If you’re asking, “why are my LED solar lights flashing at night,” the answer is usually somewhere in the power path. A weak or aging battery, a dirty solar panel, a loose connection, or a failing light sensor can make a fixture blink instead of shining steadily. Sometimes the cause is simple. A leaf may cover part of the panel, or the battery contacts may have a thin layer of corrosion.

Look closely after dusk. Does the light flash only when a car passes, or does it flicker continuously? Check whether the panel received several hours of direct daylight, then clean it with a soft, damp cloth. Inspect the battery compartment for moisture, damaged contacts, or a battery that no longer holds charge. Replace batteries only with the type and rating specified by the manufacturer. Small details matter.

A reliable diagnosis needs evidence, not guesswork. This guide follows practical troubleshooting steps used in solar-light maintenance, while recognizing that designs differ by brand. I can’t verify a named industry expert’s quotation from the material provided, so I won’t invent one or attribute a made-up sentence to a real person. Instead, we’ll focus on checks you can repeat safely: panel exposure, battery condition, wiring, sensor behavior, and signs of water damage. One check at a time. That may feel slower, but it helps identify the actual fault—and avoids replacing parts that are still working.
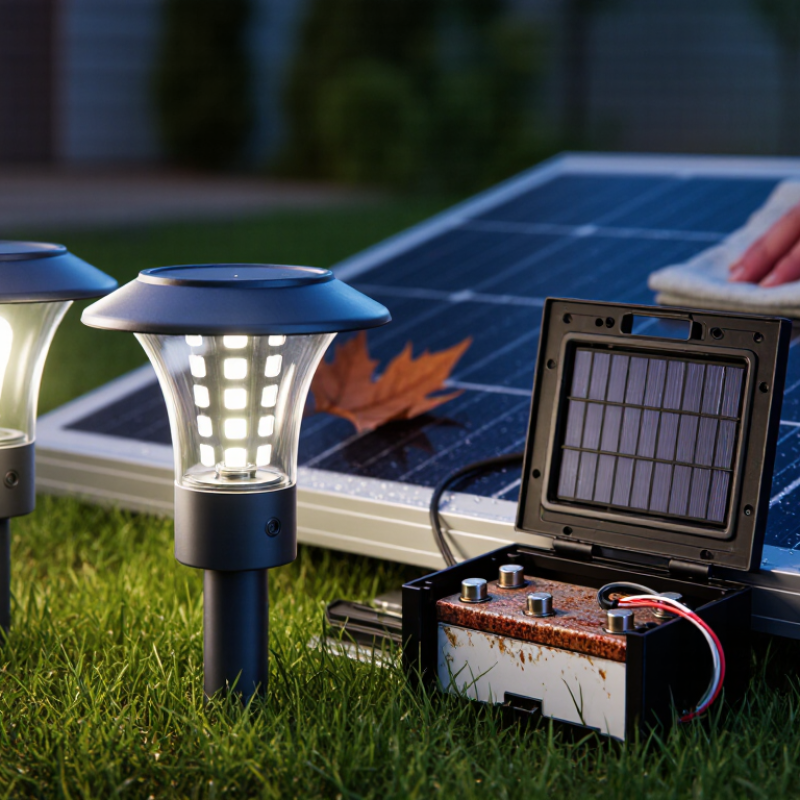
How to Fix LED Solar Lights Flashing at Night

Identify the Flashing Pattern and When It Occurs

Watch the light before changing parts. Note whether it flashes rapidly, pulses at regular intervals, or flickers only briefly. Record the time, weather, and nearby movement. A steady rhythm can point to a control or battery issue; irregular flickers may coincide with passing clouds, branches, or a loose connection. These clues are not a diagnosis by themselves. They help narrow the search.

Timing matters. If flashing starts at dusk, the light sensor may be switching near its threshold, especially in partial shade. If it begins later, the battery may be running low after a poor charge. NREL’s National Solar Radiation Database provides solar irradiance and weather data at 30-minute intervals for many locations. That data helps explain why cloud cover can change charging conditions, but it cannot confirm a fault in an individual light. Note the rhythm.

Try a simple comparison: clean the panel, clear nearby shadows, and observe the light on a clear evening. Then compare its behavior after a cloudy day. Check whether the flashing matches passing headlights or motion nearby. I may still misread one night’s pattern; repeat observations before replacing anything. If the light flashes continuously in stable conditions, inspect the battery contacts and wiring for corrosion or looseness, following the unit’s instructions.

Check the Solar Panel, Battery, and Charging Conditions

Flashing at night often means the light is not holding enough charge. Start with daylight. Wipe dust, pollen, or bird marks from the solar panel with a damp cloth, then check whether nearby branches or walls shade it. A panel can look clean and still receive too little direct sun. Try moving the light to a brighter spot for two or three clear days.

Check the battery compartment for loose contacts, corrosion, or a battery that no longer holds charge. Replace rechargeable batteries only with the type and size specified on the light. Then inspect the charging conditions: a cloudy day, winter sunlight, or a panel tilted away from the sun can leave the battery partly charged. NREL researchers’ review of nearly 2,000 photovoltaic degradation rates reported a median decline of about 0.5% per year. That study covered PV systems, not tiny garden-light panels, so it is useful context—not a direct prediction for your lamp.

If the light still flashes, cover the panel briefly after dusk to see whether the lamp behaves differently, and check the manual for its normal operating pattern. I have found that a small contact issue can mimic a failing battery, which is easy to overlook. Don’t replace parts blindly; test one change at a time.

How to Fix LED Solar Lights Flashing at Night

Check the solar panel, battery, and charging conditions. Start by confirming the battery chemistry and its nominal voltage.

These are typical nominal cell voltages, not charging-voltage targets. Use only the battery type specified for your light. If it flashes after dark, clean and reposition the panel, allow a full day of charging, and replace an old or incompatible rechargeable battery.

Inspect the Light Sensor and Operating Switch

When an LED solar light flashes at night, inspect its light sensor before assuming the battery has failed. The sensor may be a small dark window near the panel or lamp. Wipe it gently with a clean, dry cloth. Dust, water spots, or a leaf can interfere with its reading. Check the area around the light, too. A nearby porch lamp, passing headlights, or a moving shadow may make the sensor switch between day and night. Small changes matter. If practical, move the light away from other light sources and test it after dark. You can also cover the sensor briefly with your hand to see whether the lamp responds consistently.

Check the operating switch next. Make sure it is fully set to ON, not resting between positions, and select a steady-light mode if the unit offers one. Some lights need to be switched off and back on after charging or storage. Give the panel a clear, sunny day to charge, then observe the light again at dusk. Be patient. I’ve found that testing in changing daylight can be misleading. If the sensor and switch appear clean and correctly set but flashing continues, the battery or internal connection may need inspection; avoid opening a sealed unit unless its instructions allow it.

Examine Wiring, Connections, and LED Components

When a solar light flashes after dark, inspect its wiring before replacing the LED. Turn the light off and remove its battery, if accessible. Look for loose plugs, pinched wires, cracked insulation, or green-white corrosion near the terminals. Even a slightly loose connection can interrupt current and make the light pulse. Check the battery contacts, too; a bent spring may barely touch the cell. Small details matter.

Use a dry cloth to clean accessible contacts, then reconnect each plug firmly. Do not pull wires by their leads. The U.S. Department of Energy’s LED lighting guidance gives typical LED product lifetimes of 25,000 to 50,000 hours, but that rating does not guarantee every driver or connection will last as long. If the wiring looks sound, check for a damaged LED, dark spots, or a burnt smell. A cracked solder joint can be difficult to see. I’d be cautious here: forcing open a sealed lamp may cause more damage than the original fault. If the light still flashes, compare its behavior with a fully charged battery and consider replacing the sealed unit.

Apply the Appropriate Fix and Test the Light at Night

When an LED solar light flashes at night, check whether flashing is its normal motion-sensor response. If it should stay steadily lit, clean the solar panel and make sure nearby plants or objects do not shade it. Confirm the switch is on and the light is set to the mode you want. Small changes matter.

If flashing continues, switch the light off and inspect its visible connections for looseness or corrosion. Do not open a sealed battery pack; replace a weak rechargeable battery only with a compatible type. Then place the light where its panel receives several hours of direct daylight. Test one change at a time. That makes the cause easier to identify.

Test the light after dark, when the panel is no longer receiving sunlight. Watch it for several minutes, then walk past it if it has a motion sensor. Check again on a clear evening, since clouds and short winter days can leave the battery undercharged. A single night may not tell the whole story. I have found that rushing through several fixes at once can make the result confusing, so keep track of what you changed and whether the flashing improved.

FAQS

What should I observe before troubleshooting a flashing solar light?

Note whether it flashes rapidly, steadily, or briefly. Record the time, weather, and nearby movement. Note the rhythm.

Why might the light flash more around dusk?

Its sensor may be switching near the day-to-night threshold, especially in partial shade. Nearby porch lights or passing headlights can also affect it.

How can I check whether the panel is charging properly?

Wipe off dust, pollen, or bird marks with a damp cloth. Clear nearby shadows, then test the light after two or three sunny days.

Can cloudy weather cause nighttime flashing?

Yes. Cloud cover, winter sunlight, or a panel angled away from the sun can leave the battery partly charged. Compare its behavior after clear and cloudy days.

What should I inspect in the battery compartment?

Look for loose contacts or corrosion. Replace rechargeable batteries only with the specified type and size. A small contact problem can be easy to miss.

How do I test the light sensor?

Gently wipe its dark window with a clean, dry cloth. Briefly cover it with your hand and check whether the lamp responds consistently. Be patient.

Could the operating switch cause flashing?

Yes. Set it fully to ON, not between positions. If available, try steady-light mode, then observe the light again at dusk.

What if the light keeps flashing after these checks?

Repeat observations in stable conditions and change one thing at a time. Check the instructions before inspecting internal connections; do not open a sealed unit unless permitted. I may still misread a single night’s pattern.

Conclusion

If you’re wondering, “why are my LED solar lights flashing at night,” start by noting when the flickering happens and whether it follows a pattern. Flashing soon after dusk may point to a weak charge, while irregular flickering can indicate a connection or component issue. Check that the solar panel is clean, positioned to receive plenty of daylight, and not shaded. Then inspect the battery for signs of wear and make sure it is seated correctly and charging as intended.

Next, check that the light sensor is unobstructed and the operating switch is set properly. Examine the wiring and connections for looseness, corrosion, or visible damage, and look for a faulty LED component. After addressing the likely cause—such as cleaning the panel, improving its sun exposure, reseating or replacing the battery, or securing a connection—test the light after dark. Observe it for several hours to confirm that the flashing has stopped and the light operates consistently.

Madeline

Madeline

Madeline is a dedicated marketing professional with a wealth of expertise in our company's core offerings. With a keen understanding of the industry, she brings a unique perspective to her role, consistently delivering high-quality content that highlights the superior aspects of our products. As......