Solar motion lights are becoming common around driveways, patios, sheds, and remote garden paths. The International Energy Agency reported that solar photovoltaic capacity grew by about 420 gigawatts in 2023. That expansion supports wider access to small solar-powered devices. However, a light that suddenly stops responding may need more than sunlight.
This guide explains how to reset a solar motion sensor light across the main 2026 types. These include integrated LED units, detachable-panel lights, security floodlights, and adjustable wall models. The reset process can involve switching the power button, removing the battery, covering the panel, or changing the sensitivity and timing controls. Small details matter. A dusty panel, loose battery contact, or blocked sensor can imitate a software fault.
Lighting engineer James R. Benya offers a useful maintenance principle: “Treat a reset as a diagnostic step, not a cure.” That warning fits solar fixtures well. The U.S. Department of Energy notes that LED lighting uses at least 75% less energy than incandescent lighting, but efficient LEDs still depend on sound controls and adequate power. A reset cannot repair cracked wiring or a worn battery.
The practical checks in this article use manufacturer-style troubleshooting methods and field experience. They also acknowledge an uncomfortable truth: instructions vary widely between brands. Some advice may not work on every model. Start carefully, photograph the original settings, and avoid guessing when the battery compartment looks damaged.
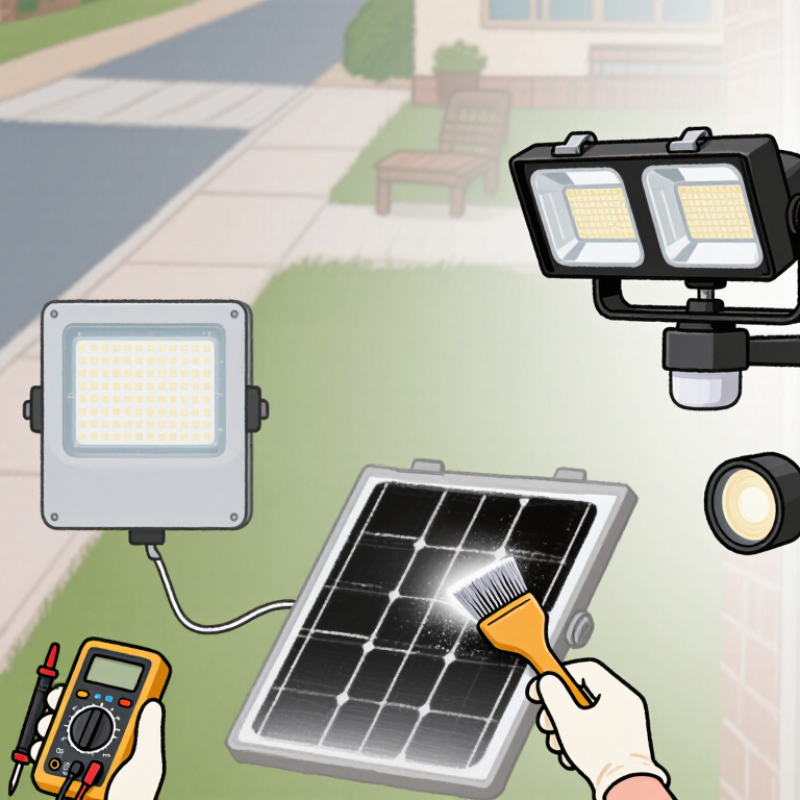
Solar motion lights use different control layouts, so identify the design before trying a reset. An all-in-one unit has the panel, lamp, and sensor together. A split-panel model connects the lamp to a separate solar panel by cable. Some lights also have a remote or a small controller beneath a rubber cover. Check for labels such as RESET, MODE, or OFF, and note the current settings before changing them.
For many all-in-one lights, switch the unit off, wait about 30 seconds, then switch it on again. Wait a minute. If it has no reset button, a power cycle may clear a temporary fault, but it will not restore every model’s settings.
On split-panel lights, disconnect the panel cable only if the manual permits it; cover the panel or move the light into shade while checking the power switch. For remote-controlled types, use the reset instructions for that controller rather than guessing at button combinations.
Afterward, let the battery charge in direct daylight, then test the sensor after dark. Keep the lens clear and aim it away from moving branches or busy roads. If the light still fails, check the battery connection and cable for looseness or damage, with the unit switched off.
A reset is not always the fix; that distinction is easy to miss. Consult the product manual when controls or wiring differ, and avoid opening a sealed housing.
Before resetting a solar motion sensor light, switch it off and place it on a dry, stable surface. Check the manual for the reset-button location and any model-specific sequence. Remove leaves, dust, or bird residue from the solar panel with a soft, damp cloth. Let it dry fully.
NREL’s 2017 review of photovoltaic soiling estimated that dirt causes roughly 3–4% of global solar energy losses annually. That figure covers larger PV systems, not small lights, but it shows why a dirty panel is worth checking.
Look for shade, cracks, loose wiring, or moisture around the housing. Don’t open a sealed battery compartment or handle damaged cells. Check that the battery is seated correctly, if the design allows access. Then give the panel several hours of direct sunlight before testing; cloudy weather or winter sun may leave the battery undercharged. It’s easy to blame the sensor too soon. That matters.
Note the current settings, such as sensitivity and timer duration, so you can restore them after the reset. Keep the light switched off during preparation, and follow the manufacturer’s instructions before touching any internal controls. A quick phone photo can help. One imperfect detail: sunlight varies, so a single charging session may not be enough to diagnose a weak battery.
A reset can clear a motion light that stays on, ignores movement, or flashes unpredictably. Start by finding its main switch or the small reset button, often near the battery compartment. Turn the light off and leave it alone for about 30 seconds. Wait a minute. Then switch it on again. Some models use a sequence of off and on positions instead, so check the printed instructions before trying repeated cycles. Keep the light dry while handling it, and avoid pulling on wires or forcing a stuck control.
If there is a reset button, press it gently with a fingertip or a blunt, non-metal tool. Hold it only as long as the instructions specify; a few seconds is common, but designs differ. Restore the switch to its normal operating position, then test the sensor after dusk or in a shaded area. Walk across its detection zone, rather than straight toward it. It is tempting to assume a reset fixes every fault, but a shaded panel, low charge, or loose battery can cause similar symptoms. Check those details if the light still fails. One small oversight matters: the switch may have separate test and normal modes.
2026 Top Types: How to Reset a Solar Motion Sensor Light?
Solar motion sensor lights usually include wall lights, pathway lamps, and wide-beam security models. Their reset methods can differ. Check the printed instructions before changing settings.
I usually begin by switching the light off and cleaning the solar panel with a soft, dry cloth. A dusty panel can imitate a sensor problem. If the unit has a reset button, press it for five to ten seconds. Some models reset through the power switch instead. Turn it off, wait one minute, then turn it on again. Remove the battery only when the instructions permit it. Never force the cover.
Let the panel charge in direct sunlight during the day. Test the light after sunset, not in bright afternoon shade. Walk across the sensor’s field at a slow pace, about three to five meters away. Crossing the detection zone works better than walking directly toward it. The lamp should activate, then switch off after its delay period. Wait between tests.
My own mistake was testing too quickly. The sensor was still cooling down. Reduce nearby movement, such as swaying branches, before judging the result. Adjust sensitivity in small steps. If the light remains inactive, inspect the battery contacts and cable seals. A reset cannot repair water damage or a worn battery.
| Light Type | Typical Reset Method | Restore Settings | Motion Detection Test | Useful Checks |
|---|---|---|---|---|
| Integrated solar light with built-in battery | Set the switch to OFF for about 10–30 seconds, then switch it back to ON. Follow the product manual if it specifies a different reset sequence. | Re-select the operating mode and adjust sensitivity, illumination time, and ambient-light threshold if those controls are available. | After dark, wait for the light to enter standby, then walk across the sensor’s field of view from several metres away. | Confirm the solar panel received several hours of direct daylight; clean the panel and make sure the sensor lens is unobstructed. |
| Solar light with a detachable panel and cable | Switch the light off, disconnect the panel cable if the manual permits, wait briefly, reconnect it securely, and switch the light on. | Set the preferred mode and sensor controls using the light’s buttons or switches. Avoid changing settings while the unit is wet. | Test at night or cover the panel temporarily to simulate darkness, then move through the detection area. | Check that the cable connector is fully seated and the panel faces a sunny area. Remove the temporary panel cover after testing. |
| Solar light with a remote control | Use the remote’s reset function if provided. Otherwise, turn the unit off and on using its main switch; reset procedures vary by model. | Choose the motion or operating mode again, then set brightness or timer options available on that unit. | Aim the remote at the receiver if required by the manual, select the desired mode, and walk across the sensor’s detection zone. | Replace weak remote batteries and check that the light is not in a continuous-on mode that overrides motion activation. |
| Dual-head or multi-head solar motion light | Use the main power switch to perform a brief OFF/ON cycle. Do not force or rotate lamp heads while resetting. | Restore the motion mode and set the heads to cover the intended area without pointing directly at reflective surfaces. | Walk through the target area from different directions; check that each head illuminates as expected when motion is detected. | Aim the sensor toward the approach path. Nearby walls, branches, or heat sources can limit or trigger detection. |
| Solar security light with adjustable PIR sensor | Turn the unit off and back on, or use its documented test/reset control. Allow the sensor to stabilize before testing. | Set sensitivity and illumination duration to moderate levels first, then fine-tune one control at a time. | With the area dark, walk across—not straight toward—the sensor, pause outside its range, and repeat to check consistency. | PIR sensors respond to changes in infrared heat. Moving objects, warm air outlets, direct sun, or glass between the sensor and target may affect results. |
| Solar light with removable rechargeable battery | Switch off the light and remove the battery only if the design allows it. Reinstall it with correct polarity, then switch the unit on. | Re-select the operating mode after power is restored. Use only the battery type and rating specified for the light. | After charging in daylight, test the light in darkness with a clear path between the moving person and sensor. | Do not open a sealed battery compartment. Stop if the battery is swollen, leaking, damaged, or unusually hot. |
Note: Reset steps and control names differ by model. Consult the light’s manual before disconnecting cables or removing batteries. For reliable testing, allow the battery to charge in sunlight and test the motion sensor after dusk.
2026 Top Types: How to Reset a Solar Motion Sensor Light?
After resetting a solar motion sensor light, test it at night. Cover the solar panel briefly with a thick cloth. Walk across the detection area, not directly toward the sensor. This gives a more realistic trigger. If the lamp stays dark, check the power switch and battery connection. A loose contact can look like a failed reset. Inspect the panel for dust, leaves, or shaded placement. Even small obstructions reduce daytime charging.
If the light flashes randomly, reduce the motion sensitivity. Nearby branches, pets, or moving curtains may trigger the sensor. If it turns off too quickly, increase the lighting duration gradually. Do not change every setting at once. Otherwise, you may lose track of the real cause. A weak battery can also cause dim output or short operation. After several cloudy days, allow a full sunny day for charging. I once blamed the sensor, but the battery simply had not recovered.
Tips: Keep the sensor lens clean and dry. Confirm the panel faces open sky. Wait ten seconds after switching modes. Some models need a complete power cycle, not only a button press. If the light works during testing but fails outdoors, check cold temperatures and nighttime shadows. Resetting is useful, but it does not repair damaged wiring, cracked panels, or worn batteries. Stop and inspect carefully.
A basic reset check commonly uses a 30-second power-off period followed by a 60-second observation period after power is restored. If the light still fails, inspect the battery, solar panel, sensor lens, wiring, and operating-mode settings.
An all-in-one unit has the panel, lamp, and sensor together. A split-panel model uses a cable between the lamp and panel. Some units include a remote or controller under a rubber cover.
Look for labels such as RESET, MODE, or OFF. Note the current settings first. This small step prevents confusion later.
Turn the light off for about 30 seconds. Then switch it on and wait one minute. Test the sensor after dark.
Press it gently with a fingertip or blunt, non-metal tool. Hold it only as long as the instructions specify. Keep the housing dry.
Some models use test and normal modes. Others require a specific off-and-on sequence. Check the printed instructions before repeating cycles.
Test it after dusk or in a shaded area. Walk across the detection zone, not straight toward the sensor. Keep the lens clean and face it away from branches.
Let the battery charge in direct daylight. Check the battery connection and cable while the unit is off. A shaded panel can look like a reset failure.
Only disconnect it when the instructions allow this action. Cover the panel or move the light into shade first. Do not pull wires or force a stuck control.
No, and that is easy to overlook. Low charge, loose connections, or damaged cables may cause similar symptoms. I might blame the reset too quickly.
This guide explains how to reset a solar motion sensor light safely and effectively, with steps that work for many common designs. Start by identifying the light’s control type, such as a power switch, mode selector, or dedicated reset button, and check its basic operating instructions. Before resetting, turn the light off if possible, place it in a safe position, and allow its controls to power down briefly. Use the appropriate switch or button sequence for the model, avoiding force or unnecessary disassembly.
After the reset, restore settings such as brightness, operating mode, and motion sensitivity. Test the light in darkness by moving through the sensor’s detection area, and give the solar panel enough daylight to charge if performance is limited. If the light does not respond as expected, check that the panel is clean and positioned to receive sunlight, confirm the battery and connections are secure, and review the selected settings. A careful reset and follow-up test can help identify whether the issue was caused by configuration, charging, or sensor placement.
